How to use Google Tag Manager / Google Analytics with Searchine Site Search
Collect analytics search data in Google Analytics using Google Tag Manager with Searchine Site Search's widgets
This example is supported by all widgets at this moment.
To integrate Google Analytics with Search data from Searchine Site Search we need to do three things:
- Extend the javascript snippet with data collection to Google Tag Manager
- Add the tag to google tag manager
- Alter the Site Search Analytics settings in Google Analytics
Extend the javascript snippet
Every widget has possibilities to handle events when searches are performed.Please take a look at the documentation of the widget for further information.
The best thing to do is to use the afterSearchDebounced event.
Example:
<script type="text/javascript">
	window._sn.searchboxes.push({
		afterSearchDebounced: function (term) {
			window.dataLayer.push({
				event: 'customSearch',
				customSearchInput: term,
				customSearchCategory: "header"
			});
		},
	});
</script>
In this example we trigger an event with Google Tag Manager and insert the term.
Please take notice of these variables:
- event: the name of the event. We used 'customSearch'.
- customSearchInput: the term search for.
- customSearchCategory: the location.
Add the tag to google tag manager
Go to Google Tag Manager and choose the account and workspace you want to edit.
Then navigate to the Tags and create a new tag.
Choose Google analytics: universal analytics and fill out these settings:
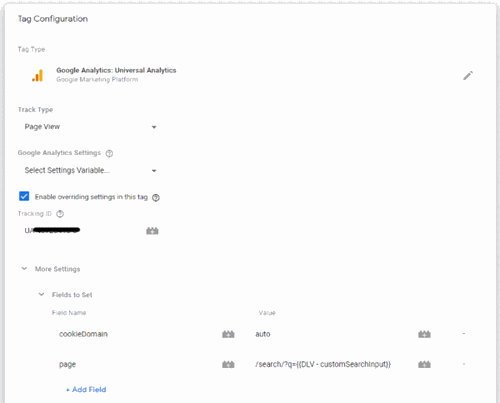
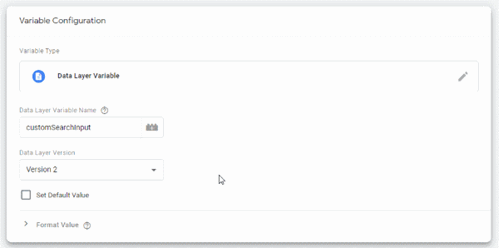
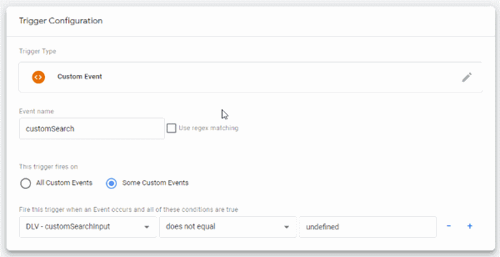
With the tag in place you need to add a trigger and one or more variables to use in the tag.
You can add those directly from within the event popup or create them first separately before adding the tag.
Add variable
Add trigger
Don't forget to publish your changes!
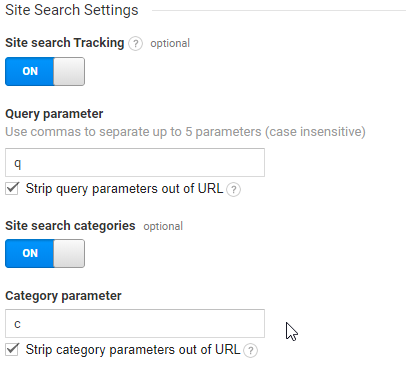
Alter the Site Search Analytics settings in Google Analytics
Open up Google Analytics and select the property you want to add the site search insights to.
That needs to be the same as account selected in GTM (example: UA-12345678-1).
Go to the admin settings (Use the gear wheel icon).
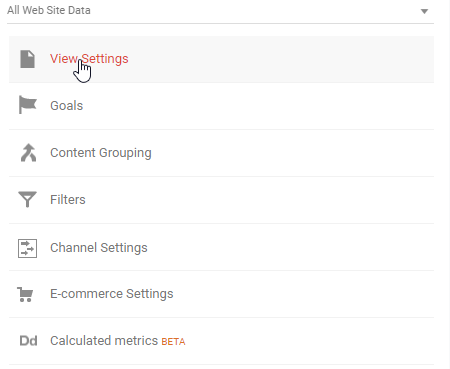
Underneath the "All web site data" go to "View Settings".
Use these settings
Press Save